


So, you want to learn the ins and outs of optimizing your WordPress website. You’ve come to the right place.
Just because you might be a novice at using WordPress doesn’t mean you should let optimization options intimidate or overwhelm you. Let’s say you have started a WordPress website on your own for your small business (way to go!), but find yourself wondering if just the use of WordPress to build your site will maximize your web exposure. In the event that you begin researching and discover the wonderful world of plug-ins, this discovery will probably be followed by confusion about how to use them. Hopefully, you have found this article which will show you how to implement the best plug-in without feeling that you are in completely over your head. This article will help begin your process with subsequent articles to elaborate further on SEO.
So, why would you need a plug-in anyway when optimizing your WordPress website?
Chances are if you are using WordPress, then your business would benefit from online marketing. Moreover, you probably understand that the singular creation of a website, despite how user-friendly it is, will not maximize your SEO (search engine optimization). This is where plug-ins enter the picture. Using plug-ins can increase your SEO and therefore increase your website traffic which will result in higher conversions. Be aware that while plug-ins are singularly important, they are one piece of a good online marketing strategy and are best used with equal consideration given to website content.
The best standard plug-in is called WordPress SEO by Yoast. Yoast is currently considered the most comprehensive search engine optimization software available for WordPress users. Yoast SEO offers everything a professional specializing in SEO can accomplish. Consequently, beginner users will more than likely be overwhelmed about where to start.
My suggestion is to start with the free version of Yoast and, before you become overwhelmed with all of the options, follow the steps below as a quick primer on how to begin.
Let’s get cracking.
1. This plug-in installs just like any other plug-in.
Plugins > Add New > Search WordPress SEO by Yoast > Install > Activate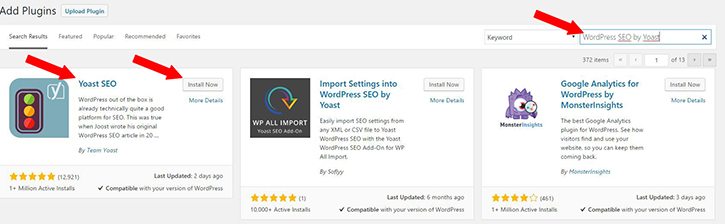
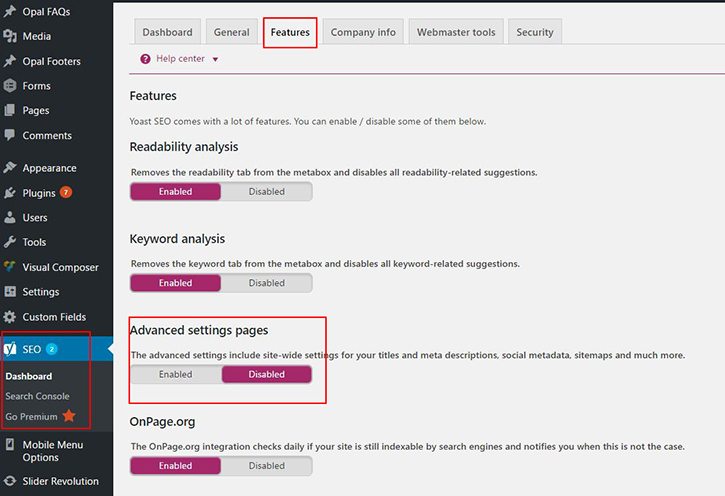
2. After installing, enable your advanced settings pages. This is important because it adds advanced functionality which we will cover in the following steps.
Yoast Dashboard > Features > Advanced settings pages > Enabled > save changes
BEFORE
AFTER
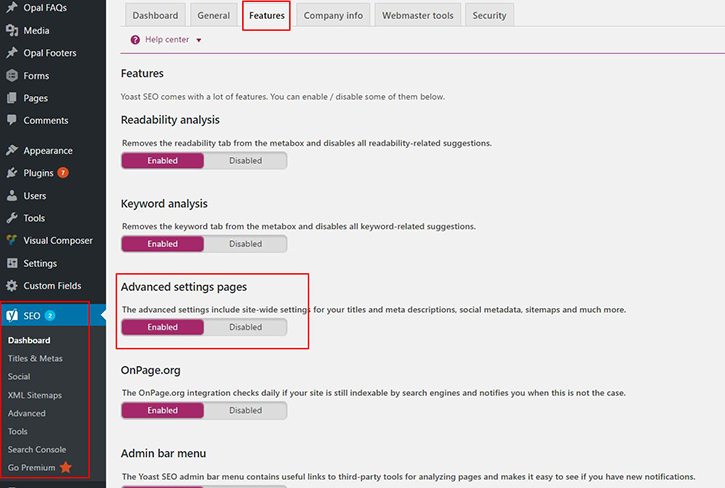
Got it? Cool. Once you have completed the install, activation, and enabled advanced settings pages we will start to customize your website. Ultimately, we want search engines to easily recognize the story your website is presenting.
Customizing Configuration Yoast for Technical SEO
Yoast SEO settings in large is for technical SEO. In this case, technical SEO just refers to any SEO work that is done aside from the content. Essentially, it’s laying a strong foundation to give your content the best chance it can have to rank for relevant keywords and phrases. Technical SEO includes:
- Crawling: search engines need to access your website content easily which leads to indexation.
- Indexation: When search engines go through your website, relevant information will be saved to their databases which enables your web pages to show up in search results.
- Duplicate/Non-essential pages: Put your best foot forward and tell the search engines what to index and what not to index.
So without further ado…
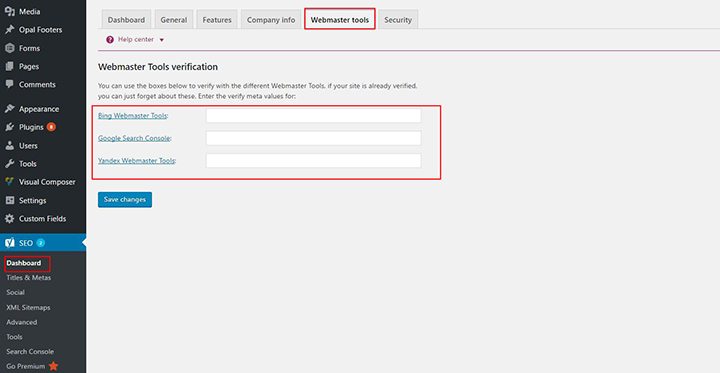
- Go to the Yoast SEO dashboard > Webmaster tools. Enter your authorization codes for Google Search console, Bing Webmaster Tools and Yandex Webmaster Tools and save changes. Google is king of the three and the most essential to sign up for through an active Gmail account. The other two will help bring value through their search networks.
-
Yoast SEO > Titles & Metas > Other Settings and check this option Subpages of archives and save changes.
- noindex optionThis will tell the search engines not to index the 2nd, 3rd and lower pages of the blog archives because these subpages are not that pertinent to searches.

- noindex optionThis will tell the search engines not to index the 2nd, 3rd and lower pages of the blog archives because these subpages are not that pertinent to searches.
-
Yoast SEO > Titles & Metas > Archives
What we are doing here is telling the search engines not to index low-quality pages. These pages usually list posts that are not that important to searches and, in some cases, can also qualify as duplicate content.
NOTE: These pages are a possible opportunity to increase your SEO but will need special content and custom structure. So for now, it is best that search engines do not index them.
Stayed tuned, I will be discussing these pages in the future.- Select Meta Robots: Noindex for Author archives settings & Date archives settings and save changes.

- Select Meta Robots: Noindex for Author archives settings & Date archives settings and save changes.
- Yoast SEO dashboard > Titles & Metas > Taxonomies
- Select Meta Robots: noindex for all the taxonomy pages and save changes.

- Select Meta Robots: noindex for all the taxonomy pages and save changes.
- Yoast SEO > Social > Accounts
- Fill out your social media information into the fields so your posts will post to your social media pages and save changes.

- Fill out your social media information into the fields so your posts will post to your social media pages and save changes.
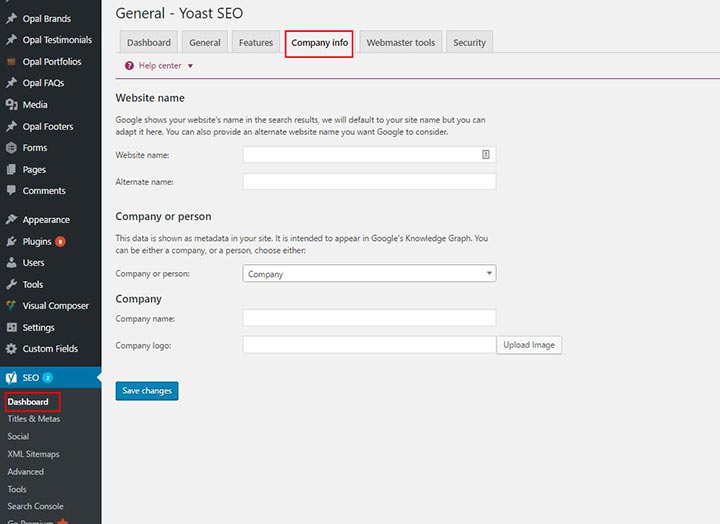
- Yoast SEO dashboard > Company Info
Go through the fields and fill out information about your business and add a logo and save changes.
- Yoast SEO > XML Sitemaps
XML Sitemaps allows search engines to crawl your website more intelligently and directs Google and other major search engines to URLS on your website that are available for crawling. Sitemaps helps search engines find webpages that might otherwise be missed.- Do not include content with a noindexing settings that was used in titles & metas > taxonomies for the XML sitemap. Be sure to set the settings to “Not in sitemap” and save changes.

- Right click on XML Sitemap and copy link address and submit it to Google and all major search engines.
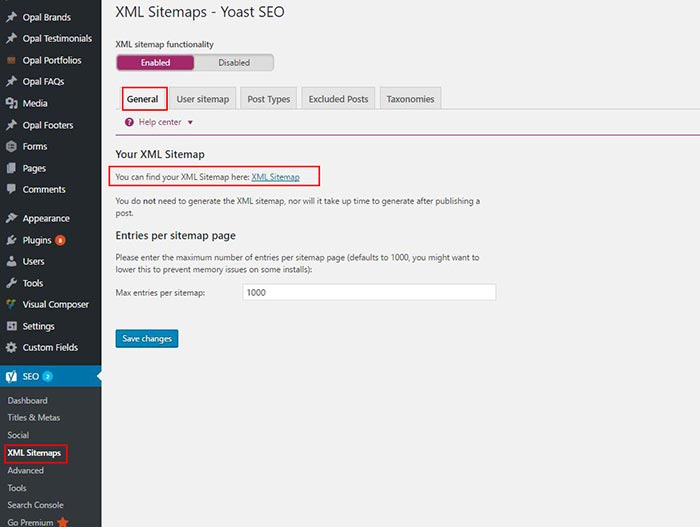
- Do not include content with a noindexing settings that was used in titles & metas > taxonomies for the XML sitemap. Be sure to set the settings to “Not in sitemap” and save changes.
Great! Pat yourself on the back if you implemented all of this successfully. There is more to cover, but this gives your website a good starting configuration that works for most WordPress websites.